


What is an inlet hose?
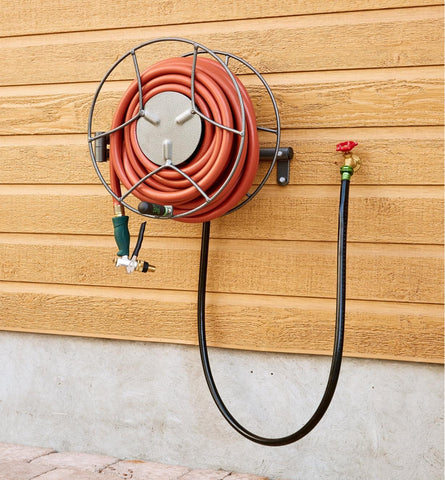
Inlet hoses have multiple names. They may also be called jumper, supply, or feeder hoses. An inlet hose is a garden hose that's much shorter in length and supplies water from the spigot to the hose reel.
Nearly any type, size, or brand of garden hose on the market today can be used as an inlet hose. The versatility is because all modern hoses are well-equipped with thread fittings.
What size is an inlet hose?

Your inlet hose can be as long or short as you need. On average, the standard length of an inlet hose would be between 6/5 ft to 12 ft. Some homeowners even opt for inlet hoses 25 feet and longer.
Can the inlet hose valve get clogged?
Yes, inlet hose valves are susceptible to clogging. However, this rarely happens to newly-installed hoses. Over time, it's natural for sediment to build up within the hose valve, which stops it following multiple uses. Apart from sediment, other pieces of debris or even tiny pests can get through and obstruct the opening.
How do you know if your water inlet valve is broken?
A few ways you can tell if your water inlet valve is obstructed or even damaged are:
- The water flow is restricted
- The water flow is slowed down or sporadic despite being on full blast
- There are noticeable leaks
- Inconsistent water temperature
Extreme temperature changes often cause cracked or damaged valves. Especially during winter, water expands once it freezes over, leading the materials containing moisture to break apart.
How do you fix a leaking inlet hose?
If you notice water seeping or spraying outwards where your garden hose connects to the spigot (or even another hose), you may have a broken inlet hose or a broken connection. Here are a few ways to remedy it:
Fixing the gasket

It's natural for these to wear out and start to crack over time, especially when exposed to extreme temperatures. To fix a leaking inlet hose, we suggest replacing the gasket, and it should be good as new.
Fixing a hole in the hose

If the leak originates from the hose's body, you may patch it up using your standard hose repair kit. Many homeowners use rubber cement or even a tire repair kit if they don't have a hose repair kit available.
The first step is to slowly cut the damaged area of the hose using gardening shears. Slip a clamp over one end of the hose, then insert the connector into it. Once the connector is in, tighten up the clamp over it.
Fixing the spigot

The faucet located outside your home that connects to your garden hose is called the spigot, hose bib, or simply the outside faucet. Because of how much usage it receives, this can also often be the source of leaks.
The washer inside most likely needs replacement if water continuously drips or runs out of the tap despite the securely closed faucet. To swap it out for a new one, follow the steps below:
- You must shut off the faucet’s water supply first.
- If there is no dedicated shut-off valve for it, you may need to shut off the main water supply while you fix it.
- Once it's off, open the tap to drain any excess water in the pipes.
- Behind the faucet handle, you can find the packing nut that holds it all in place. Loosen this with a wrench while holding the valve’s body in place with channel locks.
- Pull the stem out and remove the washer at the end using a handy screwdriver.
- Replace it with one of the exact same size and screw it on securely.
- Push the stem back in place and tighten the packing nut.
However, the packing nut may need further tightening if the water seeps out of the assembly when the tap is off.
Still leaking
If you find none of these solutions helpful, your hose may need more advanced fixes best left to the hands of a trained professional. Whether you fix your hose yourself or have a professional address it, you need to address the leak either way. This extends the life of your gardening hose and prevents you from needing to purchase a new one and paying for unnecessary water consumption. It also reduces the amount of water waste your household produces.
How do you replace an inlet hose?
The kind of hose reel you own doesn’t matter. Replacing the hose follows the same process since the inlet hose feeds from the backside of any hose reel. There are two main components you need for the replacement:
- The inlet hose
- The brass swivel
The brass swivel connects to the reel's drum and the garden hose. The inlet hose, on the other hand, threads into the backside of the brass swivel. To replace the inlet hose, follow the steps below:
- Remove the garden hose attached to the brass swivel.
- Disconnect the brass swivel from the reel’s drum.
- Pull the brass swivel gently to access the inlet hose on the other end.
- Gently unscrew the swivel off the inlet hose.
- Pull the inlet hose through the opposite end until it's all out.
- Take your new inlet hose and insert it through the opposite end with the male thread first.
- Once it is pushed through to the other side, ensure that the cam level is still aligned.
- Take your brass swivel and reattach it. Make sure it's tight but not over-tightened.
- Push the assembly back into the axle and secure it.
- Reattach your garden hose, and you’re all set!
That’s All There Is To It!
Now that you know the ins and outs of an inlet hose, your garden hoses can be well-maintained, and you can keep your water usage to a minimum!
If you need replacement parts for your garden hose reel or any other yard tools, check out the list of offers below:


