


Many things can affect the performance and health of a vehicle, including not keeping your engine cool enough to prevent overheating. The cooling system built into cars plays a very important part in extending your car’s life and keeping it working at its optimal state. One of the best things you can do for the cooling system is flush out the radiator, which you can easily do in the comforts of your garage and with basic tools.
Below, we take you on a step-by-step guide on why it is important to flush out radiators and the best way you can go about it!
What Is The Importance Of Flushing The Radiator System In Your Car?

Most modern car radiators and heaters are constructed using aluminum metal. While this type of metal is not susceptible to rust, it can be rather corrosive when submerged in water or liquid for long periods of time. We say most car radiators because there are still some others made with varied materials that may actually rust. Either way, these are why vehicle owners should flush the radiator system after every 50,000 miles.
If not flushed out, the build-up can restrict both the radiator and engine’s water passages, which leads to the engine's heater core to become too hot. Once the engine starts to overheat, it can lead to engine block, shut down, or total failure.
What Materials and Tools Do You Need To Flush The Radiator?
You can use a basic garden hose for an effective radiator flush treatment. It can do wonders in removing rust and other sediments that have built up over the course of your car’s life. Once it is clean, rust can be prevented, which lengthens the lifespan of your radiator and car in general. We highly recommend applying protection against corrosion for good measure.
Apart from a garden hose, you will need these tools and materials to effectively clean the radiator:
- Products for flushing the radiator, such as BlueDevil Radiator Flush
- Antifreeze tester
- Suitable coolant or antifreeze
- Distilled water to refill (only if your antifreeze is not premixed)
- Safety gloves
- Utility knife
- Drain buckets
- Flowing water
- Goggles
- Old rags or cloth
How To Flush a Radiator With a Garden Hose – Step-by-step guide

Now that you know why it is important and have the tools ready to make it happen, let’s get to work!
Before anything, park your car on a level surface and wait for both the engine and radiator to be cool to the touch. It is important that they are not hot or warm while you perform the flush.
Moreover, car coolants can be toxic to the human system, which is why we highly advise not to skip out on your protective gear such as your gloves and goggles.
Now, on to the steps. There are two methods to flush your radiator: regular and reverse. The reverse method gets rid of any built-up grime and sediment that may have found its way into the system’s smaller parts, so this is a much more thorough clean up but is also a bit more complicated. You may decide for yourself, which of these you find to be best suited for your vehicle.
Standard System Flushing

To make this method easier to process, we have divided it into 4 phases.
Phase 1: Using the radiator flush products
Step 1: Find the radiator cap, coolant reservoir cap, and radiator drain.
Step 2: Once you have located these, place your drain bucket under the radiator drain so that it can catch the flushed out liquid.
Step 3: Open up the radiator drain and let the antifreeze fluid drain out into the bucket.
Step 4: Once it has all been drained out, close up the radiator drain,
Step 5: Open up the radiator cap and pour in the radiator flush liquid. Use a garden hose to add water to the radiator until the water level is about one inch away from the top of the neck.
Phase 2: Cleaning out
Step 6: Close up all of the caps on the radiator and turn on the engine.
Step 7: While the engine is running, turn on the heating system within your car. By setting this on high, your thermostat housing will open up and the water and flushing liquid will then start to flow inside the radiator.
Step 8: Leave this going for about 15 minutes.
Step 9: Turn off your engine and wait for the car to completely cool down.
Phase 3: Flushing with a garden hose
Step 10: Position a bucket below the radiator screw on cap and the radiator drain valve again.
Step 11: Start draining both the water and cleaning liquid out by opening the caps.
Step 12: Loosen the hose clips on the radiator and then remove the top and bottom radiator hose.
Step 13: inset your garden hose on top of the radiator drain and seal it off with rags or cloths.
Step 14: Turn the hose on and let the water rinse out through the cooling system.
Step 15: You should expect to see some built-up sediment move. You can shut the water flow off once the water coming out of the cooling system is clear.
Phase 4: Refilling it with antifreeze
Step 16: Close the drain back and add the antifreeze plus diluted coolant mixed with distilled water into your radiator. There is no need to mix your coolant with distilled water if it is pre mixed.
Step 17: Start your engine up again and run it until the antifreeze stops bubbling and you start to see its level rising up.
Step 18: If necessary, top up with water in the expansion tank,
Step 19: Ensure that all the caps and drains are closed up again, and you’re done!
Reverse System Flushing
Since the standard system flushing method is not always enough to get all that gunk out and clear large amounts of built-up debris, you can opt to use the reverse method instead. To achieve this, you will first need to purchase a radiator back flush kit.
Once you have secured the kit, follow these steps below:
Step 1: Switch off your card engine and allow it to completely cool down.
Step 2: Disable your vehicle central heating system and turn off your radiator water supply.
Step 3: Release the system pressure by opening up the radiator cap.
Step 4: Place a drain bucket under the radiator drain plug to catch all the liquid.
Step 5: Open up the radiator drain and wait for all the liquid to drain out.
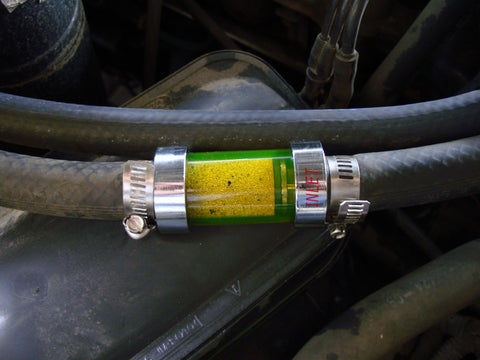
Step 6: With a utility knife, cut the heater hose connecting the engine and the radiator. Double-check your car’s manual to locate this.
Step 7: Insert the upper radiator hose into the T-shaped junction pipe found in your back flush kit.
Step 8: With a screwdriver, tighten up all the clamps on the junction pipe and secure everything in place.
Step 9: Place your garden hose on the free end of the T-shaped junction pipe.
Step 10: Add the diverter found in your back flush kit on top of the radiator. You may also connect a hose to the diverter so that all the flushed out fluids can be neatly diverted into the bucket.
Step 11: Turn your car’s heating system back on.
Step 12: Turn on the garden hose and flush out the antifreeze or coolant from the system.
Step 13: Keep the hose on until the water starts to run clear, this means that the system is now completely free of rush, debris, and other things building up inside.
You’re All Set!
Maintaining your cooling system has just gotten easier and more affordable now that you can flush out your radiator at home!
If you need more irrigation supplies to keep your car neat and in tiptop shape, check out our best selling offers below:
Yard Butler Garden Hose Reel Carts


