If you’ve been through our blog, you’re now an expert on the types of flower bulbs and where/when to buy them. That’s the easy part. In this blog post, we’re going to get our hands dirty and learn the nitty-gritty of planting and caring for flower bulbs.
When to Plant Bulbs
Timing is crucial for bulb planting. Plant too early and the bulb will never sprout, plant too late and the bulbs won’t sprout in time to be fully enjoyed. All flower bulbs are different, and therefore need to be planted at different times. There are two main bulb seasons which are broken down in these two types:
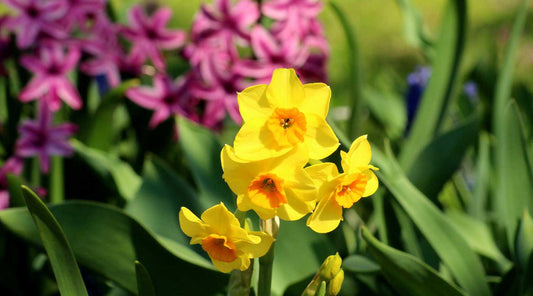
Hardy Bulbs or “Spring Bulbs” are referred to as such because they are planted before the winter and require extremely cold temperatures to be basically shocked into sprouting and blooming in Spring. Shocking, I know. Some of the most common Spring bulbs are daffodils, tulips, and alliums. For a more robust list of Spring Bulbs, head over to Breck’s to peruse their selection.
Tender Bulbs or “Summer Bulbs” are not as tough as their hardy counterparts. If you try to plant these bulbs during cold temperatures they will die, so give them a little more love and plant these bulbs in Spring. You will be rewarded with beautiful blooms in the summertime, and depending on the bulb you may get to enjoy your flowers into Fall as well. Some examples of summer bulbs are begonias, lilies, and dahlias.
Once you have determined which season of bulb you want, you need to then plant based on your specific hardiness zone. If you purchase from one of our recommended vendors from our Bulb Buying blog post, they will all give you the specific time you should plant your particular bulbs.
How to Plant Bulbs
As with any plant, soil composition is important for bulbs and the first thing you should consider. They prefer a nice even pH of 7.0, and this can be achieved in a raised bed, containers, or directly in the ground. Sandy loam, a mixture of silt, clay, and sand will help you achieve this pH. This mixture is also ideal for drainage; bulbs do not do well when they are overwatered. As for fertilizer, we always recommend Dr. Earth, as they have consistently high quality, organic products. Their Organic and Natural Spectacular Bulb Food should be applied to the soil when you first plant, and every six weeks after that.
Many gardeners love bulbs because they produce magnificently colorful flowers and brighten any area they inhabit. When planting bulbs you can either map out a specific design or go with a more natural look. Regardless of your design aesthetic, you need to be sure to plant at the appropriate depth. A foolproof system is to plant the bulb about three times as deep as the bulb is long. Your larger bulbs like lilies can sometimes be a couple of inches long, and therefore you would want to plant them six inches deep. For super-easy planting, the Yard Butler Bulb and Garden Planter is the perfect tool, and it allows you to plant from a standing position (which is great for anyone with a more sensitive back). If you want a bit more control you can also use Yard Butler Roto Driller in your power drill and dig holes up to seven inches deep.

When planting you also want to consider how far apart your bulbs should be for optimal bloom potential. It’s recommended to keep your bulbs about two bulb-widths apart, but many gardeners have had success planting them even closer. If you want a more concentrated clump of flowers, you can take that risk and probably still see some good results. And don’t forget, bulbs love the sun so plant in a bright location!
Once you have your holes dug to your liking, you need to make sure you’re putting the bulbs in the correct position. If it’s a true bulb, there will be an apparent point that is the top of the bulb. If you can’t identify the pointy end, you can look for the sign of roots, or a rough side, which is the bottom of the bulb. If all else fails, bulbs love the sun and when planted on their side will still usually manage to find their way up and out!
When your bulbs are tucked into place, cover them with soil but don’t pack it too tight. If you live in a colder climate you should cover the area with mulch until it’s blooming time. You need to water the area thoroughly after you first plant, but bulbs do not need much watering again until the weather warms up. Follow specific watering instructions based on the type of bulb you have.
How to Handle Bulbs After Blooming
For both Spring and Summer bulbs you may cut the flower stem for beautiful bouquet arrangements, but do not cut the foliage or the bulbs may have problems performing next season.
Specifically for Spring bulbs your treatment of the bulb in the offseason depends upon your climate. If you live in a warmer zone, you need to dig up the bulb so that you can chill it for next year. For colder climates, you can go ahead and leave the bulbs underground. If you want to remember where your bulbs are, put a marker in your garden or planter. If you want to live a bit dangerously, just forget all about it until the next year when you’re pleasantly surprised by new blooms.
For Summer bulbs it’s the opposite. They may be left in the ground in warmer climates with the help of a little mulch but should be dug up for next season in colder climates.
Hopefully, this guide to bulb planting will ensure your success, but don’t feel bad if you have some hiccups! Practice makes perfect and your garden will thank you for trying.